Homespun Hearts Part II

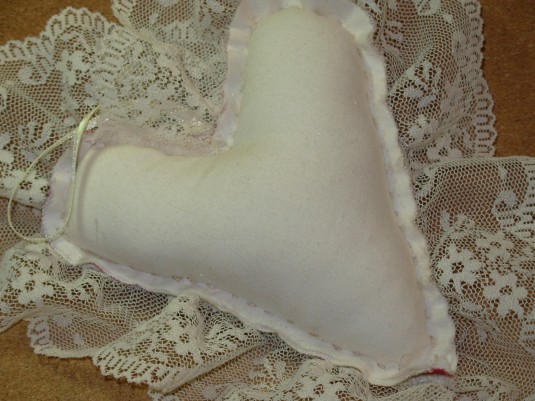
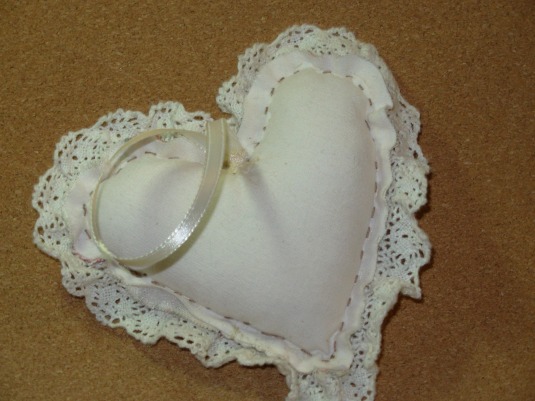
In case you’re curious, here’s the backside of the two hearts I posted yesterday. They’re hand-stitched and really so easy a child could make one. In fact one of these would be a perfect gift for a teacher.

Homespun Hearts on JanMadeIt

I used plain muslin for the backsides. That somewhat uneven tan running stitch is how I attached the back to the front. I stitched it right sides together and left the raw edges exposed.  I don’t figure they’ll see a lot of use so I think the raw edges will be OK.

I stuffed it tight. I crammed it with fiberfill and closed it up one stitch at a time.

Homespun Hearts on JanMadeIt

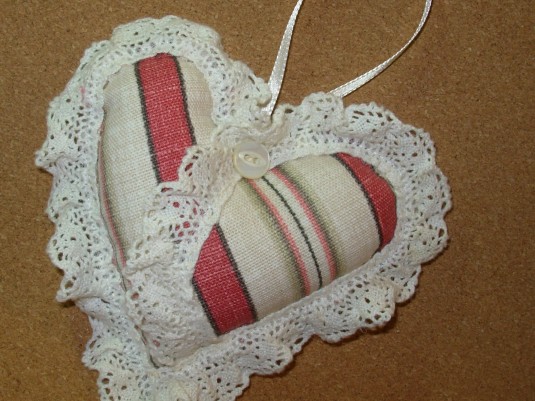
I used white thread and stitched the lace to the front. I stitched along the original seam to reinforce it. When I finished I attached a loop of ribbon for a hangar.

Homespun Hearts on JanMadeIt

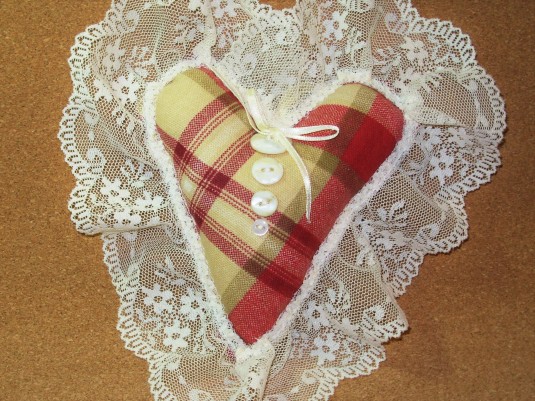
I attached the buttons on the front as a final touch. Don’t trim the lace “to fit” until you stitch it on. You’ll have to gather and pleat the lace around the curves and corners, so don’t trim it until you get it all attached.

That’s all there is to it.

Enjoy.

Jan

Homespun Hearts

How’s this for stash management?

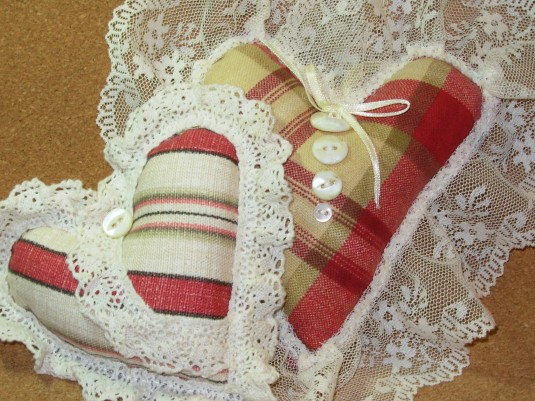
I made these hearts with scraps of home decorating fabric, wedding lace, and vintage buttons. I even stitched them by hand. Whipped them up in an evening during a few hours of TV.

They would be nice on a Christmas tree, but alas, they did not get that far. They are still hanging where I left them just after I took these pictures.

Two Scrappy Shabby Hearts on JanMadeIt

I’d had this scrap of cotton lace forever. The way the ends were unraveling I tend to think it was handmade. It was only about 15-ish inches long so it was never enough to do anything with until now. I think I have about three inches left. It’s still in my stash.

Homespun Hearts on JanMadeIt

I changed the shape for this heart of sturdy upholstery cotton. I paired it with a delicate lace, which appears to be machine-made. I have no idea what kind it is.

I finished off both hearts with a few vintage Mother-of-pearl buttons. I love sorting through my button boxes.

Homespun Hearts on JanMadeIt

Both hearts have satin ribbon ties for hanging on a tree, or a door knob, or anywhere you think they’d be cute.  You could fill them with lavender and make a sachet to put in a drawer or hang in the closet. You could also fill them with rice and after a zap in the microwave keep them in a pocket to warm your hands in this crazy cold winter.

So I didn’t make much of a dent in my stash, but I didn’t buy anything to make these either. I probably have enough fabric and random lace to make a dozen or more of these.  And of course they’d all be different. They would be part of a very pretty rustic farmhouse holiday style.

They could also tag a Valentine’s day gift, adorn a flower arrangement, or hang from a wreath. Put a little pocket on the back and they could be the package for a very small Valentine’s gift.

Any other ideas on how to put these to use?

I could make some templates if anyone wants them, but these are pretty easy to make freehand. Do it just like in grade school. Fold the fabric in half and then cut a curve around it . You can even practice with paper first if it makes you feel better. And then you can use that paper for a pattern if you like it.

Easy peasy.

Hope you’re all staying warm.

Jan

Sew a Softie Paisley Bird

Maybe it’s my hippie roots showing, but I don’t think I’ve ever met a paisley I didn’t like. So while surfing through some of the crafty, sewing, DIY blogs I’m addicted to, a little bird caught my attention. It was a clever little bird with lots of body parts and fancy stitching.  It was more trouble that I was up for at the time, but the wing was in the shape of a paisley. And voila. This little bird was born.

I started doodling paisley patterns and came up with something I liked. This tutorial is part of the ‘ Sew a Softie for the Festive Season‘ tutorial hop. Check out the list of other softies over at Coloured Buttons,

I literally made this little birdie out of scraps, but if you’re new at this stitching stuff and don’t have a stash to raid, you’ll need two or three colors of crafting felt and a smidge of cotton fabric. Pick one color for the bird, one color for a wing, one color for the beak, and a scrap of cotton.

Paisley Bird Softie on Jan Made It

Use regular all-purpose sewing thread for the basic assembly. You’ll need black and matching or contrasting colors of embroidery floss or pearl cotton. The bird will hang on a scrap of ribbon, cord, twine or other trim. A handful of fiberfill is all you’ll need to stuff it.

The tools you need are basic: sewing needle, embroidery needle, some pins, and scissors. Small scissors will help you manipulate the curves a little easier.

So download this pattern and get started.

Paisley Bird Ornament Pattern-JanMadeIt

Cut out the pieces and start with the top layer.

Paisley Bird Softie on Jan Made It

I used white sewing thread to tack the scrap of calico to the wing. I stuffed it with a tiny bit of fiberfill as I made my way around the shape.

Paisley Bird Softie on Jan Made It

OK, I know that’s not a tiny bit, you know how things will take more stuffing than you think they will. But you’re right, most of that didn’t go into the wing. In fact, a little snippet of quilt batting, just a bit smaller than the scrap, would probably work as well.

Anyway…

Paisley Bird Softie on Jan Made It

After you get the calico wing attached, stitch it to the body of the bird in the same way. Start at the back and stuff it as you go. Notice I’m still using the white thread which is practically invisible on these colors.

Paisley Bird Softie on Jan Made It

At this point I realized the checked homespun was going to fray more than I wanted, so I appliqued it with a satin stitch to seal the ragged edge. I used red pearl cotton.

Now pin the front to the back and put the body together. I used the same red thread and a blanket stitch. I started at the center back and did the tail first. I had to stuff it along the way to get stuffing pressed firmly into the tip of the tail. Use the eraser end of a pencil or other pointy object, but not your scissors, to cram the stuffing all the way to the corner.

Paisley Bird Softie on Jan Made It

Keep stitching and stuffing your way around the body. As you get to the face, have the beak handy and pin it in place.  I used two little triangles for my beak, but you only need one to do the job.

Don’t forget to stitch a little black eye.  A cluster of satin stitches or a French knot will do the trick.

Paisley Bird Softie on Jan Made It

Fold the ribbon in half and insert it at the back of the head. If you put the ribbon on the top of the head his tail will droop when you hang him. Center the ribbon between the front and the back of the bird to keep him on an even keel when he hangs on your tree.

Isn’t he cute?

This is the first time I’ve included a pdf pattern with one of my posts. The illustration is rather primitive, but now that I have my feet wet I’ll get better. In the meantime, it will do the job.

Let me know what you think and if you make one, I’d love to see how it turns out. If my instructions aren’t clear, just ask.

Hope you enjoy this little guy.

Jan


Effie’s Makeover

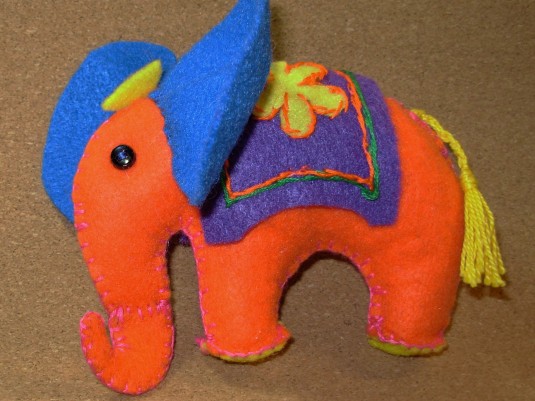
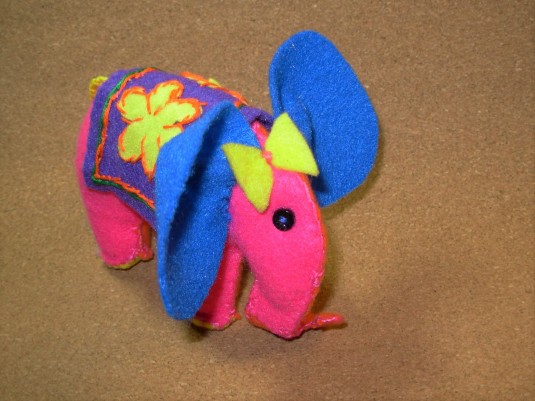
Well, Effie the Elephant was cute before, but now she’s just too, too, two times as cute.

Effie the Felt Elephant on JanMadeIt 1

Just seemed like she needed a hair bow and a bright flowery blanket with appliques and lots of embroidery.

Effie the Felt Elephant on JanMadeIt 2

I just can’t seem to leave well-enough alone. Now all my other critters look naked.

Might have to do something about that. If so, I’ll be figuring out how to make little bitty hats, scarves, and other teeny tiny fashion accessories.

What d’ya think? Better with clothes, or without?

Jan

Previous Older Entries